【インターンステラ】GitLab Runnerの構築
こんにちは、國分です。
今回はGitLab環境のCI/CDに必要なGitLab Runnerの構築方法を説明します。
公式ドキュメントはこちら
バイナリのダウンロード
$ sudo curl --output /usr/local/bin/gitlab-runner https://gitlab-runner-downloads.s3.amazonaws.com/latest/binaries/gitlab-runner-darwin-amd64
実行権限の付与
$ sudo chmod +x /usr/local/bin/gitlab-runner
Runnerの登録(対話形式)
$ gitlab-runner register

Please enter the gitlab-ci coordinator URL (e.g. https://gitlab.com )
https://gitlab.com

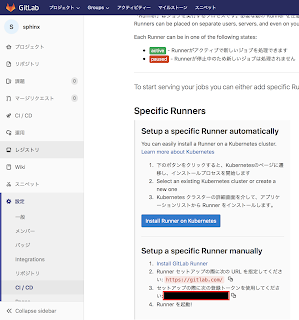
Please enter the gitlab-ci token for this runner
画像の赤枠部分
Please enter the gitlab-ci description for this runner
[hostame] my-runner

Please enter the gitlab-ci tags for this runner (comma separated):

Whether to lock Runner to current project [true/false]:
[true]: true

Please enter the executor: ssh, docker+machine, docker-ssh+machine, kubernetes, docker, parallels, virtualbox, docker-ssh, shell:
shell
確認のためのコマンド
$ cd ~
$ gitlab-runner install
$ gitlab-runner start

$ gitlab-runner status
gitlab-runner: Service is running!
この文が表示されれば成功です。
これで.gitlab-ci.ymlの記述内容が実行されるようになりました。
終わり
次回はGitLab+Sphinx+Google App Engineで自動ビルド&デプロイする方法について
SNSでフォローする


